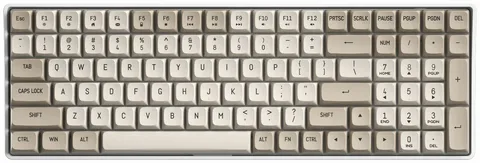
In recent years, custom mechanical keyboards have become increasingly popular among tech enthusiasts, gamers, and productivity-focused individuals. One of the most sought-after layouts is the 87-key (also known as TKL or Tenkeyless) configuration, which strikes a balance between functionality and compactness. If you’re ready to take on a rewarding DIY project, here’s how to build your own custom 87 keyboard: a step-by-step guide to help you through the process.
Why Choose an 87-Key Layout?
Before diving into the build, it’s important to understand why many opt for the 87-key layout. Unlike a full-size keyboard, the TKL omits the number pad, saving desk space while retaining essential keys like function rows, arrows, and navigation keys. It’s ideal for people who need efficiency without the bulk.
Step 1: Gather the Necessary Components
To build your custom keyboard, you’ll need the following parts:
- PCB (Printed Circuit Board): The core of your keyboard.
- Case: Houses and protects the components.
- Plate: Supports the switches and adds stability.
- Switches: Choose from tactile, linear, or clicky depending on preference.
- Keycaps: Aesthetic and functional top pieces of each key.
- Stabilizers: Needed for larger keys like the spacebar and enter key.
- USB Cable: For connecting your keyboard to the computer.
- Soldering tools (unless you’re using a hot-swap PCB).
Step 2: Choose and Prepare the PCB
When learning how to build your own custom 87 keyboard: a step-by-step guide, selecting the right PCB is crucial. Hot-swappable PCBs are great for beginners because they allow you to install and remove switches without soldering. If you’re using a soldered PCB, make sure it’s compatible with your case and layout.
Step 3: Install Stabilizers
Before adding switches, install the stabilizers on the PCB. Lubricating them can help reduce rattling and improve the feel. This step is especially important for keys like Shift, Enter, and Spacebar.
Step 4: Mount the Switches
Place your plate on the PCB and begin inserting the switches into their appropriate slots. If you’re using a hot-swap PCB, press the switches into place. For soldered PCBs, make sure the switch pins are correctly aligned before soldering each one to the board.
Step 5: Assemble the Case
Once all the switches are in place and secure, place the completed PCB into your case. Secure it using the appropriate screws. At this point, your keyboard is almost fully assembled.
Step 6: Install Keycaps
Now it’s time to personalize your keyboard with keycaps. Whether you’re into minimal designs or vibrant themes, choose a set that reflects your style. Gently press each keycap onto its corresponding switch.
Step 7: Test Your Keyboard
Use an online keyboard tester or software like VIA/QMK to ensure all keys register correctly. If you used a programmable PCB, now is the time to configure your layout and shortcuts.
Final Thoughts
By following this detailed guide, you now understand how to build your own custom 87 keyboard: a step-by-step guide that covers everything from parts selection to final testing. Building a custom keyboard isn’t just about aesthetics or performance—it’s about crafting a tool tailored to your needs and preferences. Whether you’re a gamer, coder, or writer, a custom TKL board can elevate your typing experience.
So, if you’re ready to take on a fun, rewarding project, start with this guide on how to build your own custom 87 keyboard: a step-by-step guide, and build a keyboard that’s uniquely yours.
